Maximizing Daylily Blooms: Fertilizer Tips and Rainy Day Experiments

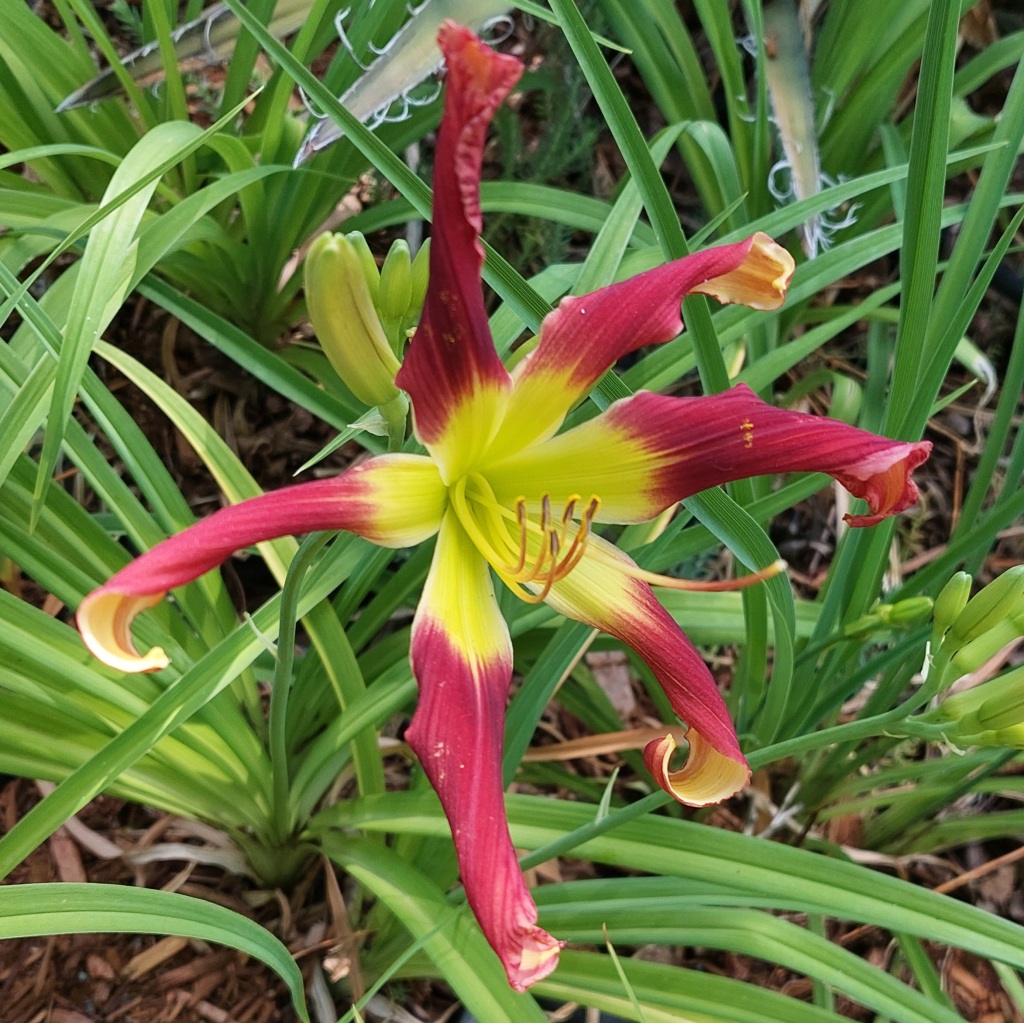
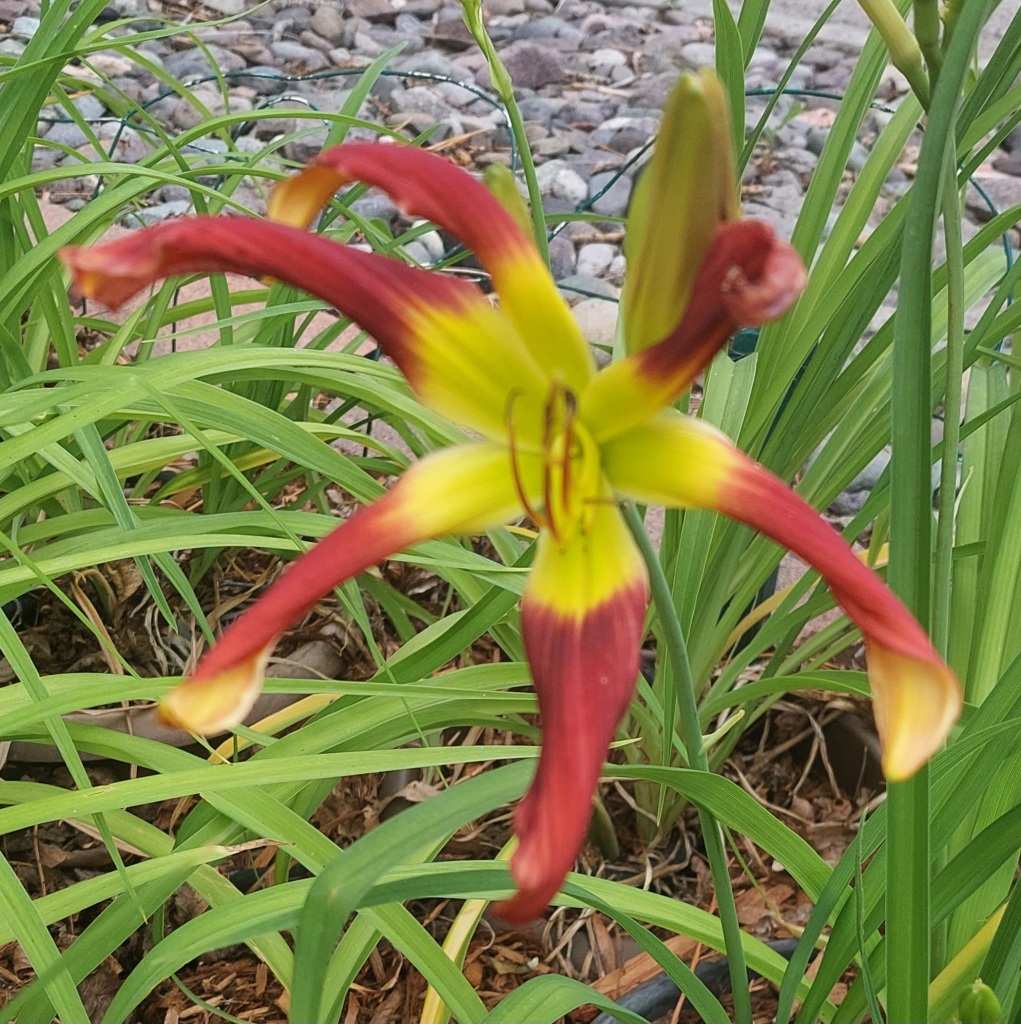
Ruby Spider, my gateway daylily (I’m a daylily addict), showed up for the first time this season. I adore these big red and yellow blooms. Several years ago, I divided her and I now have her in 3 places. She is the only one that can thrive in this clay soil of the Colorado Plateau with all the competitive plant roots.

Ruby Spider 6.26

Today was also a perfect day for a little experiment with fertilizer. Overcast, drizzly, and pretty cool. Tomorrow is supposed to be pretty rainy. By the time I was done, it was sprinkling.

Comanche Princess 6.26

I used to fertilize spring and fall with a sprayer. I am not sure why I stopped. Probably just got busy but I am thinking I need to fertilize more regularly. Pot soil doesn’t interact with the environment the way that ground soil does. The soil can run low on nutrients.

This is the fertilizer I used today – I put 1/3-1/2 cup per plant. I used more for larger pots and plants that had not scaped. Fingers crossed.

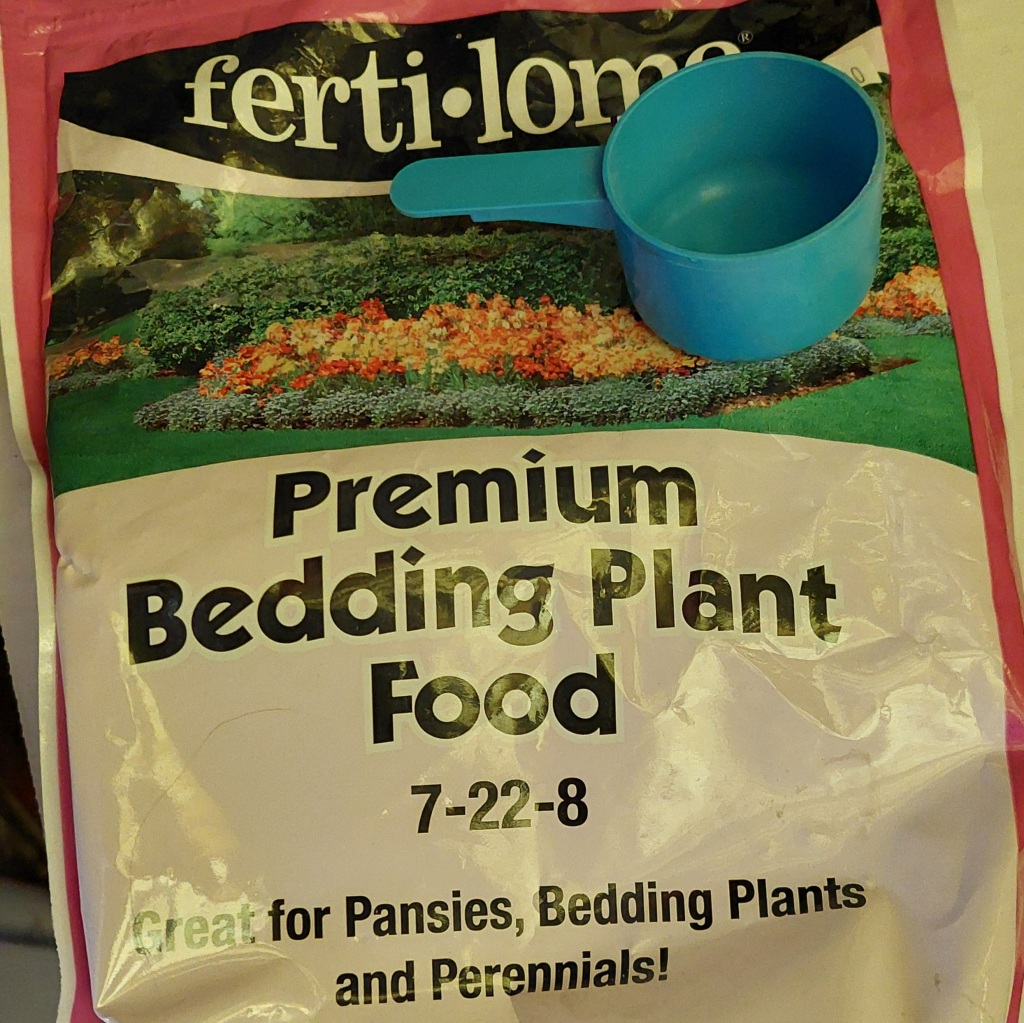
Today, I used a perennial fertilizer that may help with inducing some blooms. It is a slow-release type dry fertilizer and I only used it sparingly. I put more closer to the drip system water source. I made this choice because if the soil is depleted, this might be better than a spray.

A small amount of fertilizer in each pot.

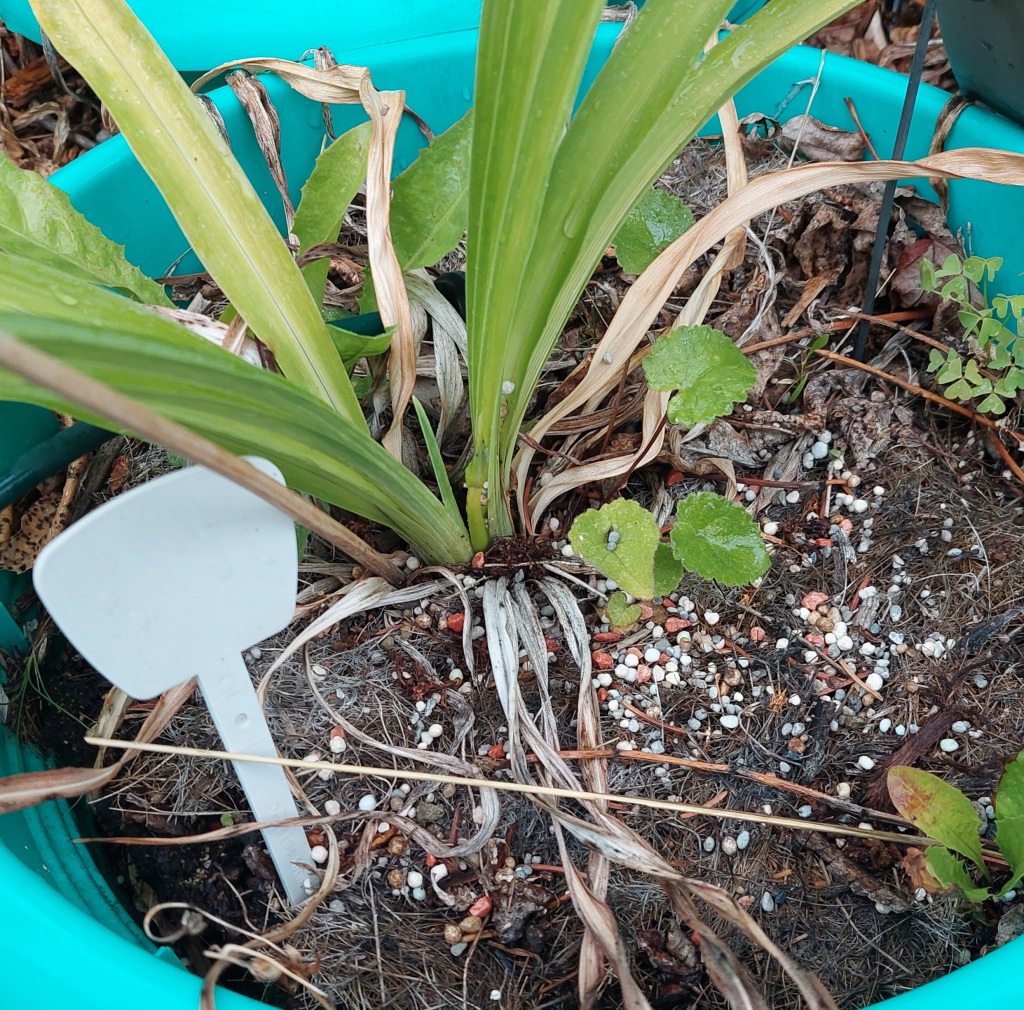
I always hold my breath a little when temps are this warm. I have turned daylily plants a stunning yellow by overdoing it with fertilizer, especially with high temps and low water. Sigh – so much for blooms. I am hoping the rain really washes this in tomorrow, but I will likely step up my irrigation for several days.

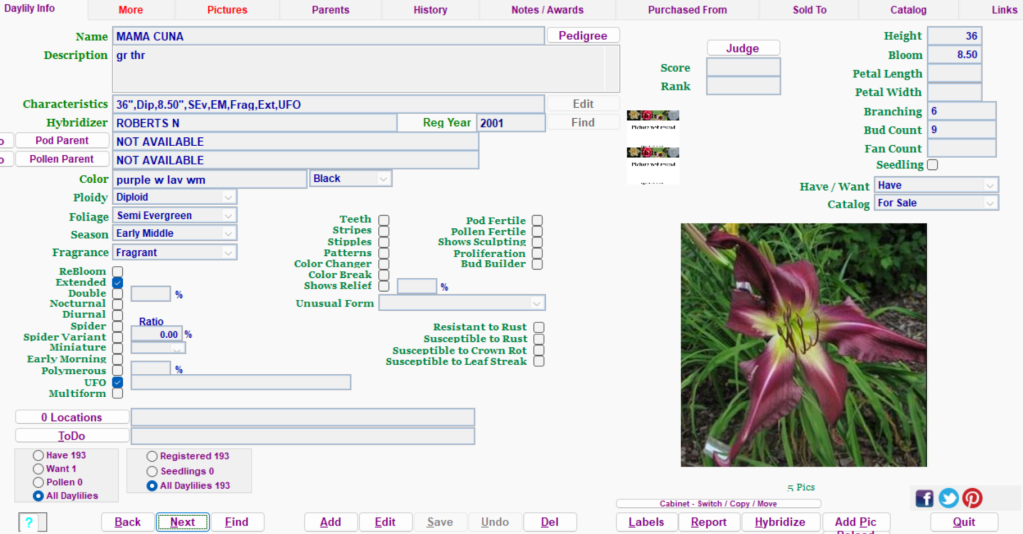
I also got more daylily photos from last year (and a few from this year) added to my software. If I put a photo of the bloom each year, then I can look back and see if something hasn’t bloomed for a couple of years. That’s a great way to know which pots may need some TLC in the fall or early spring. Or, sometimes, I move it to a different location in the yard to see if that makes a difference.

My daylily software screenshot.

I decided that, for now, I am going to focus on water and fertilizer for the strugglers. I don’t want to mess with roots for fear of stopping any bloom they may have coming – and roots don’t like to be messed with in the heat. I may purchase more coir circles or just buy landscape fabric to put over the top of the grass in the grass/weed-infested pots. Landscape fabric has the advantage of being tucked in a little around the edges, but it is a pain to cut into circles.

I always forget how much time the blog takes. And, I am trying to add backlinks, so that adds more time. Hopefully, I can finish cataloging photos tomorrow – which will help with time. However, wait until peak and keeping up with 60 blooms in one day! Yikes.

Until the Last Daylily Blooms Sale On Etsy

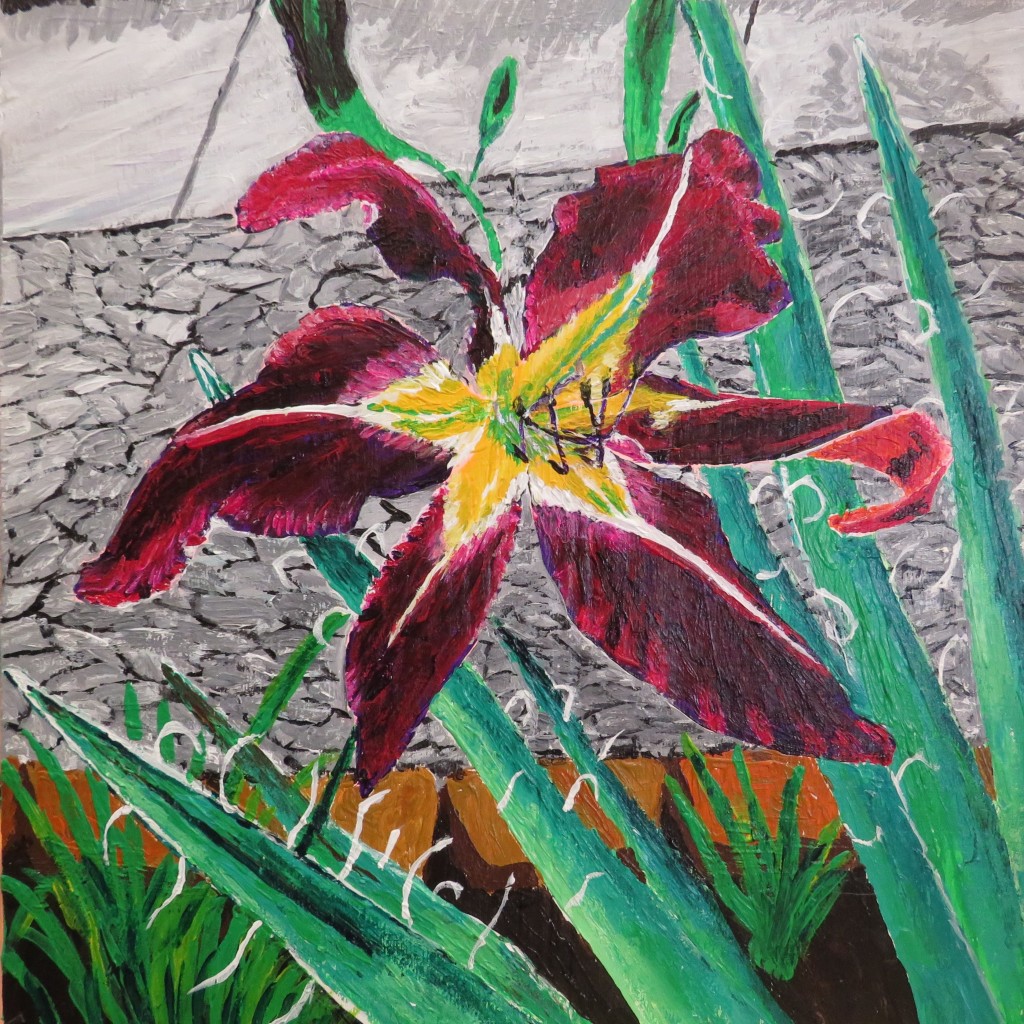
Don’t forget to visit my Etsy shop to see all the daylily art that is on sale for the summer. I also wanted to share one of my tile clocks. This one is on sale until July 5th (not part of the daylily art sale) and is called Arizona Road Trip. The vibrant red-orange center reminds me of a daylily. Click on this link or the photo below to visit the listing.

Arizona Road Trip tile clock.

I think I am going to make some pours during the peak by using the primary color of each cultivator in my yard that day. That will be pretty fun! I’ll add those to the sale! Cupboard knobs, clocks, coasters, succulent planters. Can’t wait!

Daylily Care: Tackling Weed Infestation and Pot Maintenance

What happened today was a couple first blooms for the season – Comanche Princess and a NOID that I call Dark Mystery. But that’s not all . . .

Today, I wrestled daylily pots! Nothing is as frustrating as grass and creeping bellflower in my pots! Desert daylilies need water – so I have drip systems for 90% of my daylily pots. It is like velcro for grass seeds, grassroots (despite having weed fabric under each pot), and the bellflower. Additionally, the bellflower has tuberous roots that look very much like daylily roots – but lighter in color. Left unattended, they can eventually crowd the daylily out. (Tips for keeping weeds out of pots.)

Unfortunately, chemical choices are limited because the roots of these plants intertwine with the daylily. I have had some luck with the coir rounds – but they wear out in a couple of years and are somewhat expensive in bulk.

I extract the inhabitants of the pot and slowly pull soil and roots away until I expose the daylily roots. Then, I hydro-wash the daylily to get any remaining alien roots off (hopefully) and I repot in new soil. It is a time-consuming process and the pot’s old dirt must be discarded. If you know of an easier way – please post a reply and share your expertise. It is my least favorite part about my daylilies.

Video showing daylily root system.

But, I digress. The day started with me wanting to get the high-bloom fertilizer that I talked about in the blog yesterday. I decided to daylily shop while at the nursery because I had some strugglers that needed to be replaced. I stopped at three nurseries and only one had any daylilies that I don’t already have. So, I got the fertilizer, 2 new daylilies, and some filler plants.

Video on how to fertilize daylilies.

When I got home, I freed the strugglers from their grass and moved them to a different spot to (hopefully) recuperate. I filled the pots with the new daylilies. Now, we wait. I’ll fertilize tomorrow before the storm on Thursday – and I will talk about that in my next post.

Daylily Art Sale on Etsy: Until the Last Daylily Blooms

Don’t forget my daylily art sale. This original painting of Mama Cuna on a wood panel is perfect for the daylily lover’s decor! Click here or on the photo below for the Etsy shop listing.

Mama Cuna acrylic on wood panel.

Slow Start and Creeping Bellflower

As my Facebook memories pop-up, I become aware how slow this year is as far as blooms. I have the same 4 in bloom as yesterday.

I counted 103 scapes yesterday and 111 today. So, I think it’s not far off. I’m still upset that so many of my new ones parished over the winter.

I wanted to talk a little about weeds. Creeping Bellflower is the nemesis of my front garden. I thought the pots would keep the things from spreading, but they also send seeds. This article has good info https://www.gardeningknowhow.com/ornamental/flowers/campanula/removing-creeping-bellflower.htm

Photo of Creeping Bellflower in my walkway garden last year.

The worst part is their roots look like pale daylily roots, and they grow right into the daylily root structure so it looks like daylily root. They grow tall and smother the daylilies.

This year, I’d had enough but was hesitant about herbicides. So, I decided to smother them back. I put down thick landscape fabric (including under each pot) and mulched over that. I bought about $200 in the round pot disks made of coir. Most my pots have those. My other invader is grass, so this should help that, too.

The walkway garden today. Creeping Bellflower 90% gone.

So far, so good. I’ll keep you posted.